How to Repair Ripped Leather Car Seat: Easy DIY Guide
Many car owners know the frustration of dealing with ripped or torn leather seats. You’re not alone—Leather car seat damage is common and can be pretty upsetting, especially if you want to keep your vehicle looking its best.
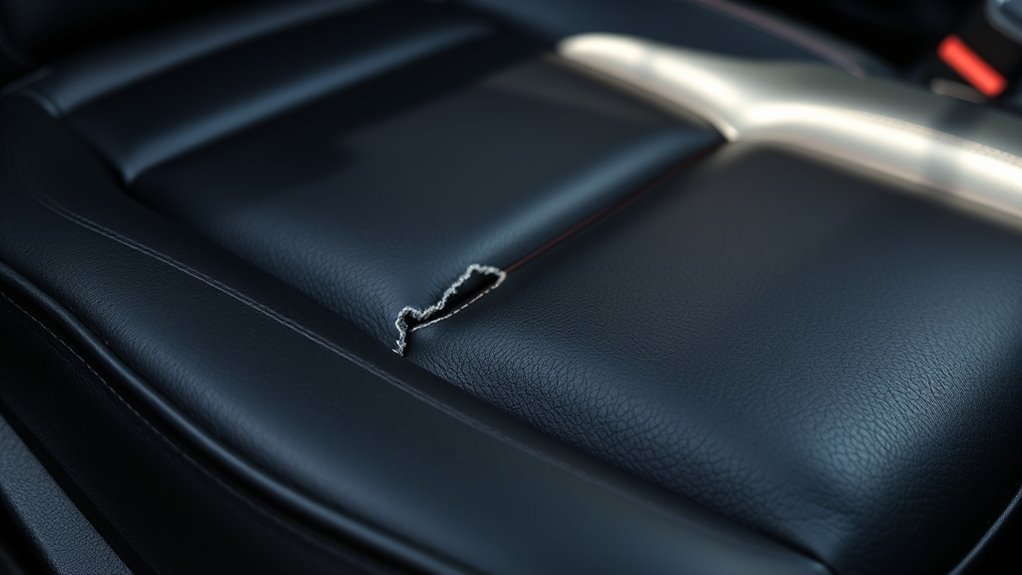
To repair ripped leather car seats yourself, start by evaluating the damage—small tears can often be fixed with a leather repair kit, while larger splits may need professional attention or seat replacement.
Clean and prep the area, then use adhesives, fillers, and color-matching dyes for seamless repairs.
Apply conditioners and protectants afterward to maintain flexibility and appearance.
For more detailed steps and expert tips, continue exploring how to effectively restore your leather seat.
Key Takeaways
- Assess the tear size and damage to decide if you should repair or replace the seat for better durability and safety.
- Clean the area thoroughly, lightly sand it, and match the leather dye to ensure a seamless repair.
- Use a quality leather repair kit with compatible adhesive, fillers, and colors to get the best restoration.
- For small tears, apply filler and blend in the color. For larger tears, use adhesive and reinforce with backing material.
- Keep the leather in good shape by regularly cleaning, conditioning, and applying protectant to extend your seat’s life.
How to Assess if Your Leather Seat Needs Repair or Replacement
Before deciding whether to repair or replace your leather seat, you should examine how bad the damage is. Check out the tear or rip—if it’s small and contained, fixing it with leather dye or stitching might be enough.
Look at minor scratches or light scuffs. These are easier to handle and usually don’t require a full replacement. But if the rip is big or the leather is splitting apart, replacing the seat might be the better option.
Check the area around the damage for signs of wear or weakening leather. If you leave it untreated, those spots could get worse over time. Repairing loose or frayed stitching is often simple, but if stitches are coming undone, resewing might be needed.
Think about the overall condition of the seat. If the leather is badly cracked or worn through in multiple areas, replacing it is probably your best choice for safety and looks.
Essential Tools and Materials for Leather Seat Repair
To effectively repair a ripped leather car seat, you’ll need a specific set of tools and materials designed to restore both the appearance and integrity of the leather. First, you’ll require a leather repair kit, which includes adhesive, pigments, and surface filler compatible with your seat’s leather thickness.
Second, keep in mind that matching the seat cushioning is essential; use foam pads or backing fabric to reinforce weak areas. Third, a leather patch or repair patch can help cover larger tears securely.
Fourth, don’t forget to have a fine-grit sandpaper and a leather conditioner to blend the repair seamlessly into the surrounding leather. These tools and materials guarantee you address both aesthetic and structural issues related to seat cushioning and leather thickness.
With the right supplies, you’ll simplify the repair process and achieve professional-looking results.
Steps to Prepare Your Leather Seat for Repair
Start by cleaning the area around the tear thoroughly using a damp cloth and mild soap or leather cleaner. Removing dirt, oils, and debris guarantees proper adhesion of repair materials. Once clean, dry the area completely.
Clean the torn area thoroughly with a damp cloth and dry completely before repairing.
If the tear is near seat padding, check for loose fibers or foam that might need smoothing or trimming to prevent uneven repair. Lightly sand the damaged area with fine-grit sandpaper to create a rough surface, helping the leather dye and repair compound adhere better.
If color fading is noticeable, consider matching the original color with a suitable leather dye. This will help blend the repair seamlessly. For more extensive tears, temporarily protect the surrounding area with painter’s tape.
Proper preparation minimizes visible repairs and ensures a smoother, longer-lasting fix. Taking these steps now makes the repair process more effective and professional-looking, saving you time and money later.
How to Choose the Best Leather Repair Kit for Your Seat
Choosing the right leather repair kit can make all the difference in achieving a seamless and durable fix for your car seat. To do this, consider these key factors:
- Leather Grain Compatibility: Verify the kit matches your seat’s leather grain, whether smooth, embossed, or textured, for an authentic look.
- Color Range and Fading: Pick a kit with a variety of shades that can blend with your seat’s color, especially if your leather has experienced color fading over time.
- Repair Material Quality: Opt for high-quality fillers and adhesives that provide flexibility and durability, preventing future cracks or tears.
- Ease of Application: Look for kits that include thorough instructions and tools, making the repair process straightforward, even for beginners.
Step-by-Step Guide: Repair Small Tears and Scratches
When repairing small tears and scratches in your leather car seat, careful preparation is key for a seamless fix. Start by cleaning the damaged area with a mild leather cleaner to remove dirt and oils, ensuring proper adhesion. Use a soft cloth to gently dry the surface.
Compare leather care products with fabric repair options to choose the right filler or colorant that matches your seat. Fabric comparison shows that leather repair kits tend to offer more durable and flexible results, which is perfect for small tears and scratches.
Apply a leather patch or filler carefully, following the instructions included. Use a sponge or brush to blend the repair with the surrounding surface, making it look natural.
Afterward, apply a leather conditioner to restore moisture and flexibility to the repaired area. With these simple steps, you’ll achieve a clean, professional-looking repair that improves your seat’s appearance and helps it last longer.
How to Repair Bigger Tears and Make the Repair Seamless
So, when you’re dealing with bigger tears, the trick is to blend those edges carefully. Take your time to smooth out the rough sides of the tear so it looks as natural as possible once repaired.
Adding a sturdy backing? That’s a smart move. It helps prevent the tear from getting worse and gives your repair that extra strength it needs to last.
And honestly, the secret to making the repair nearly invisible is all about proper blending and reinforcement. Once you get those right, your repair will look seamless and hold up well over time.
Blending Edges for Seamless Look
Blending edges for a seamless look becomes essential when repairing larger tears, as unwanted scars can be obvious and distracting. To achieve this, focus on effective seam blending and edge smoothing. Here are key steps:
- Gently sand the edges of the tear to create a smooth, tapered surface.
- Apply a leather adhesive to join the edges seamlessly, then press and hold until set.
- Use a color-matched leather filler to even out any uneven surfaces.
- Carefully buff the repaired area to blend the new material with the surrounding leather.
This process helps hide the repair and makes it look natural. Proper seam blending and edge smoothing are crucial for a professional, invisible finish that restores your seat’s appearance.
Reinforcing Larger Tears Effectively
For larger tears, simply filling the area won’t give you enough strength for a lasting repair. To reinforce bigger tears, you should add a backing material behind the leather, which improves durability and keeps the texture consistent.
Use a thin piece of leather or an adhesive-backed patch that matches the size and texture of your tear. Carefully place the patch behind the torn area, making sure it fully covers the tear with some overlap.
Next, apply a strong leather adhesive along the edges to bond the patch securely. Gently press and smooth the repair to blend it seamlessly while maintaining the leather’s texture. Reinforcing larger tears this way gives your repair strength and a cohesive look, helping prevent further damage.
How to Color Match Leather for a Natural Finish
Wondering how to get a seamless, natural finish when coloring your leather seat? The secret is in skillful color correction and careful dye application. To match your leather color effectively, follow these simple steps:
Achieve a natural leather look with gentle dyeing, blending, and careful application for a seamless finish.
- Assess the Color: Compare the original color with your dye options to find the closest match.
- Prepare the Surface: Clean and lightly abrade the area so the dye absorbs evenly.
- Apply Dye Gradually: Use a sponge or applicator for thin, controlled layers, letting each dry before adding more.
- Blend and Adjust: Use a color mixer or complementary dye to tweak the hue until it blends smoothly with the rest of your seat.
Applying Conditioner and Protectant for a Long-Lasting Repair
To make sure your repair sticks around, begin with a good cleaning of your leather surface to get rid of dirt and oils. It’s a simple step that really sets the stage for everything else.
Once it’s clean, go ahead and apply the conditioner evenly across the leather. This helps restore the moisture and flexibility, making your leather look and feel like new again.
Finally, don’t forget to put on a protectant. It’ll help boost the durability and keep your seat looking great for a long time. It’s all about giving your leather the best care so your repair lasts!
Properly Clean Leather Surface
Before applying any repairs, it’s crucial to clean the leather surface thoroughly. This step ensures that the conditioner and protectant stick properly. Plus, it helps remove stains and keeps the leather’s color matching accurate.
Start by using a gentle leather cleaner to remove dirt and oils, which can cause damage later on. Wipe the surface with a soft cloth, paying extra attention to stained or discolored areas.
If there are stains, use a specific stain remover meant for leather. Be sure to follow the product instructions carefully. After cleaning, let the leather fully dry before moving on to conditioning.
Allowing each step to dry properly helps the conditioner absorb better and results in a more durable repair. This prep work creates a smooth, clean surface, making the repair process more effective and professional-looking.
Apply Conditioners Evenly
Once you’ve cleaned the leather surface thoroughly and it’s dry, you should apply the conditioner and protectant evenly across the area.
Proper conditioner application is essential for effective leather restoration. It helps hydrate and soften the leather, preventing cracks and further damage.
Use a soft cloth or applicator pad to spread the conditioner in gentle, circular motions, ensuring complete coverage of the repaired and surrounding areas.
Avoid over-saturating the leather, which can lead to buildup or uneven patches. The goal is an even layer that infiltrates the leather’s pores.
This enhances flexibility and appearance. Take your time to distribute the conditioner uniformly; this step is key to achieving a seamless, long-lasting repair.
Proper application maximizes the benefits of your leather restoration efforts.
Use Protectant for Durability
After applying the conditioner, you should immediately follow up with a protectant to improve the leather’s durability. This step shields the repaired area from wear and tear and helps maintain its look over time.
To maximize its effectiveness, use a high-quality protectant specifically designed for leather cleaning and care. Apply it evenly with a soft cloth to cover all surfaces, including seams.
Allow the protectant to soak in, then gently buff for a smooth finish. Regularly clean your seats and ensure proper seat ventilation to prevent moisture buildup, which can weaken the leather.
This process helps preserve the leather’s suppleness and resists cracking, guaranteeing your repair lasts. Consistent maintenance extends the life of your car seat’s leather, keeping it looking fresh and well-cared for.
Tips to Maintain Leather Seats and Prevent Future Rips
Ever wondered how to keep your leather car seats looking their best and avoid costly tears? Proper maintenance is key. Regularly clean your leather upholstery with a gentle cleaner to prevent dirt and oils from wearing down the material. Applying a quality leather conditioner keeps the surface supple and reduces cracking.
To prevent rips, avoid sharp objects and excessive stretching of the seats. Seat ventilation helps maintain air circulation, reducing moisture buildup that can weaken the leather over time. Park in shaded areas or use sunshades to protect your seats from harsh sunlight, which can cause fading and brittleness.
Keep your seats free of debris and avoid placing heavy or sharp items on them. If you notice early signs of wear, take immediate action to repair small damages. Consistent care extends the life of your leather upholstery and keeps it looking fresh, smooth, and less prone to tears.
When to Seek Professional Help or Consider Replacing Your Leather Seat
If your leather seat is seriously damaged or torn in several spots, trying to fix it yourself might not do the trick. Sometimes, the repairs you do at home can look worse or even cause more damage down the line. When that happens, it’s usually a good idea to reach out to a professional who knows how to handle these issues properly. Or, if the seat is beyond saving, thinking about a replacement might be the best way to go.
When Damage Is Extensive
When the damage to your leather car seat is widespread or severe, trying to fix it yourself might not do the trick. Large tears or deep cracks often need professional leather care to bring back its look and strength. Don’t be fooled by DIY myths that say all repairs are possible at home; sometimes, they can make things worse.
Look out for signs that it’s time to call in an expert or consider replacing the seat. If the damage covers more than a few inches or spreads across big areas, it’s probably too much for a simple fix. The leather peeling, cracking, or becoming stiff from deep damage is also a red flag.
If repairs start looking uneven or unnatural, that’s another warning sign. And if the damage makes the seat uncomfortable or affects safety, don’t wait—seek professional advice. In these cases, pros can tell you if repairs will hold or if it’s better to replace the seat altogether.
Limited DIY Repair Options
Large tears or extensive damage often surpass simple DIY fixes and need professional help. If the leather is badly ripped or shows a lot of wear, a pro can clean, match the color, and restore it for a natural look that lasts longer.
When considering repairs, keep an eye on seat ventilation. Damage can block airflow and make the seat less comfortable. If your seat’s damage stops cleaning or exposes foam padding, it’s time to get expert help.
DIY repairs usually can’t fix deep or widespread tears reliably. Sometimes, replacing the seat might be more cost-effective if the damage is severe or affects the seat’s safety and comfort. Professional repair or replacement ensures safety, comfort, and a good finish.
Frequently Asked Questions
Can I Repair Leather Seats in Removing Old Dye or Stain?
Yes, you can repair leather seats by removing old dye or stains. Start by cleaning the leather with a mild cleaner to lift the stains and old dye.
Once cleaned, make sure the seat is completely dry before applying any dye or leather paint. Careful color matching is key to blending the repair seamlessly with the original color.
This process helps restore your seat’s appearance, making it look fresh and well-maintained.
How Long Does a Typical Leather Seat Repair Last?
A stitch in time saves nine, especially for leather repairs. Typically, a well-done leather seat repair lasts between 3 to 5 years, depending on how you care for and use it.
Leather dye helps restore the color, but how long the repair lasts also depends on your maintenance habits.
Keep your seat clean and conditioned, and try to avoid excessive sun exposure. Doing so can help your repair look fresh for years to come.
Are There Eco-Friendly Options for Leather Repair Kits?
Yes, eco-friendly leather repair kits are available that use vegan options and plant-based dyes. These make repairs safer for the environment.
You can find kits that avoid animal products and rely on natural colorants. They help you restore your leather seat without using harmful chemicals.
These options are perfect if you want to keep your car looking great while choosing sustainable products. They let you combine style with eco-consciousness.
Will DIY Repairs Affect the Resale Value of My Car?
DIY repairs can slightly impact your car’s resale value if they don’t look professional. To avoid this, focus on proper leather cleaning before fixing and make sure your seat repair blends seamlessly.
Good seat protection and regular maintenance also help keep the leather’s condition up, making repairs less noticeable. Be honest about any DIY fixes when it’s time to sell; open communication can help preserve your car’s value.
How Do I Prevent Future Rips After Repairing?
Imagine slipping into your car, feeling the smooth, supple leather under your fingertips. Avoiding future rips starts with regular leather conditioning, which keeps the material flexible and resistant to cracks.
Invest in seat cover protection to shield against everyday wear and tear. By keeping up with these habits, you can boost your seat’s durability, making your repair last longer and keeping your interior looking great, no matter how many adventures you have.
Conclusion
Remember, taking care of your leather seats isn’t just about fixing rips; it’s about preserving their beauty and integrity. Regular maintenance can stop small damage from turning into bigger problems, kind of like tending a garden.
Sometimes, despite your best efforts, professional help is the way to go. Trust that investing in proper care not only restores your seats but also teaches patience and respect for your vehicle’s craftsmanship.
By doing so, you’re reinforcing the idea that attention to detail helps maintain the longevity of your leather car seats, especially when repairing rips.