How to Identify and Fix Engine Oil Leak From Head Gasket
Many car owners have experienced the frustrating issue of an engine oil leak from the head gasket. You’re not alone—these problems can be tricky to spot and even more challenging to fix without the right tools and knowledge.
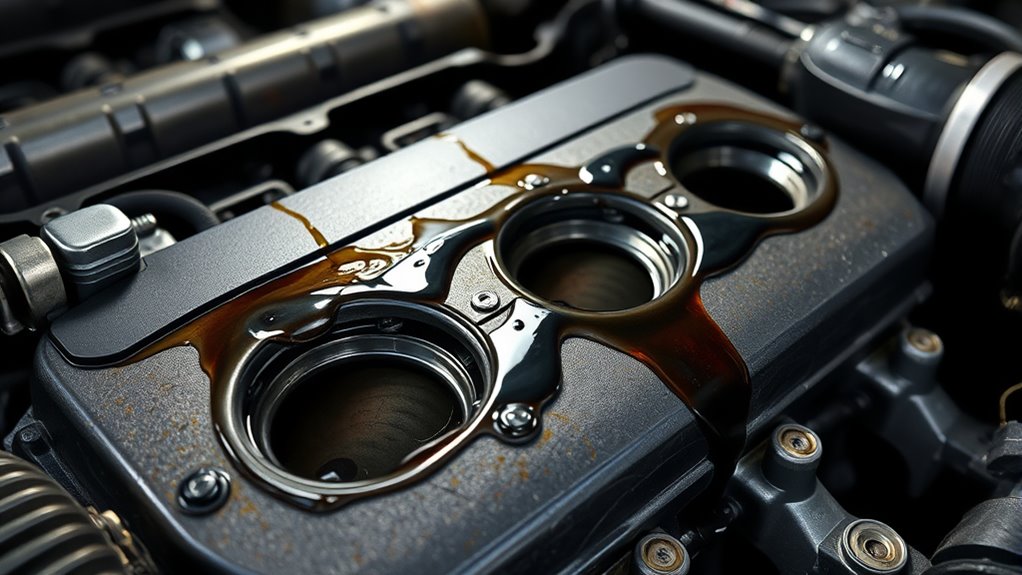
To identify an oil leak from the head gasket, look for visible oil stains or puddles around the engine and under your vehicle, especially near the cylinder head.
Check your oil level regularly and watch for dark spots or residue.
Use a flashlight to spot fresh oil, which can help you catch leaks early.
Performing pressure tests or dye inspections can provide a more precise way to locate the leak.
If you keep noticing leaks, there’s more to investigate to fix the problem effectively.
Addressing head gasket oil leaks promptly can save you money and prevent more serious engine damage down the road.
Key Takeaways
- Look for oil pooling, stains, or residue around the cylinder head or engine block that might indicate a leak.
- Check your oil levels regularly and watch out for unexplained drops or dark spots on engine parts.
- Do visual inspections and perform pressure tests to find cracks or damage in the head gasket.
- Fixing it usually means removing the cylinder head, cleaning the surfaces, and replacing the faulty gasket.
- If the leak continues or if your engine overheats or shows signs of oil and coolant mixing, it’s best to get professional help.
How to Spot an Oil Leak From Your Head Gasket
To identify an oil leak from your head gasket, start by inspecting your engine for visible signs of oil pooling or stains around the cylinder head area. Look for oil spots on the engine block or components beneath the head gasket.
Inspect the engine for oil stains around the cylinder head for early leak detection.
Next, check the condition of the gasket material. If it’s deteriorating or cracking, oil may seep through. Understanding engine oil helps here because thicker or contaminated oil can speed up gasket wear.
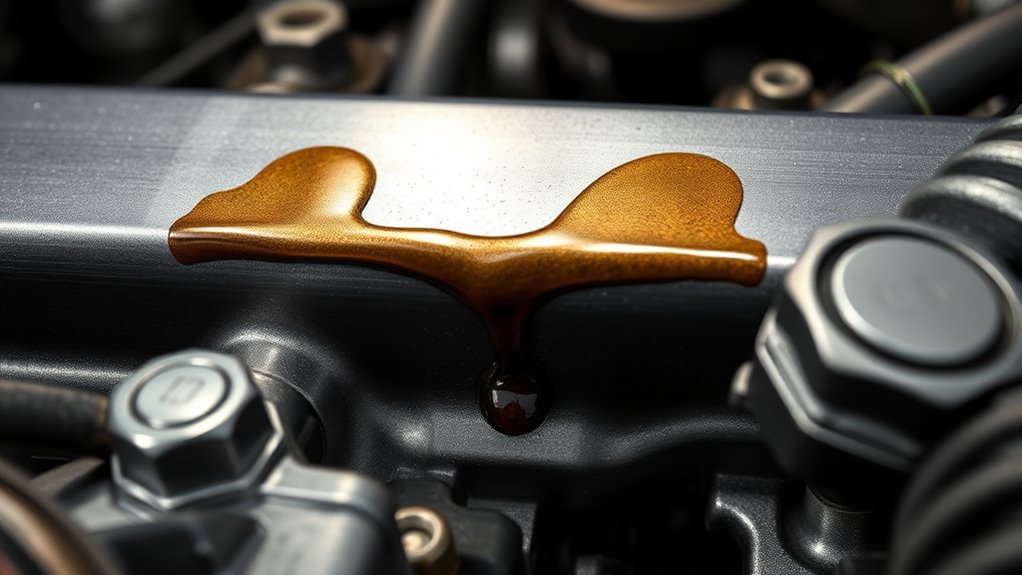
If the oil is leaking near the seam between engine parts, that’s a clear sign of gasket failure. Also, watch out for a burning smell or smoke, which can mean oil is escaping and touching hot engine parts.
The gasket’s ability to handle heat and pressure affects how long it lasts. Regular visual checks can help you catch leaks early before they cause bigger problems.
What Causes Head Gasket Oil Leaks?
Head gasket oil leaks often happen because of the gasket’s exposure to extreme heat and pressure, which can weaken it over time. When the engine gets hotter, the gasket faces more stress, making it easier for wear and cracks to develop.
Temperature fluctuations make the metal and rubber components expand and contract, which can weaken the seal. Oil viscosity also matters; low-viscosity oils flow more easily and can seep through tiny imperfections, causing leaks.
Over time, contaminated or degraded oil makes things worse by reducing lubrication and putting extra stress on the gasket. Keeping the right oil viscosity and managing engine temperature are key steps to prevent head gasket leaks.
In the end, high heat, pressure cycles, and oil properties all contribute to gasket deterioration. That’s what allows oil to escape from the seal.
How to Inspect Your Engine for an Oil Leak
Sure! Here’s a more conversational version of the text:
Start by taking a good look at your engine. Just scan around and see if you notice any oil spots or leaks, especially near the head gasket area. After that, check your oil levels—if they’re running low, that might mean you’ve got a leak somewhere. Once you’ve got that figured out, try to trace any signs of oil back to where it’s coming from so you can pinpoint the exact source of the leak.
Visual Inspection Techniques
Performing a visual inspection is your first step in diagnosing an engine oil leak that may stem from the head gasket. Start by inspecting the engine bay when it’s cool, since engine temperature can affect oil viscosity and how leaks appear.
Look for fresh oil spots or wet residues on the head gasket area, cylinder heads, and surrounding parts. Check for oil streaks or crusted deposits that might show a leak has been ongoing.
Checking Oil Levels
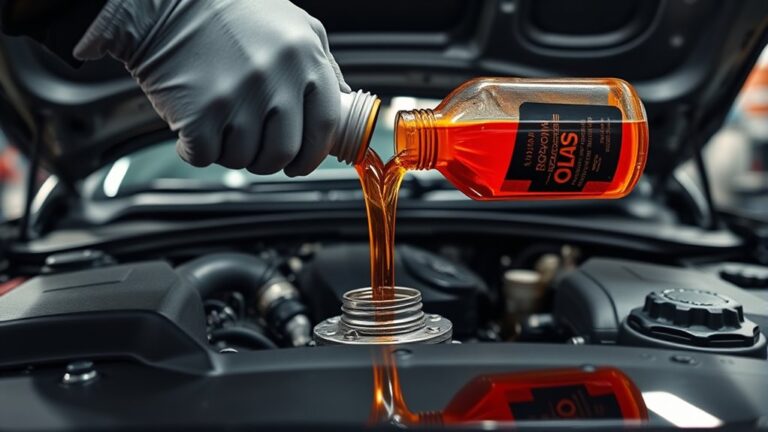
Ever wonder if your engine is losing oil? Start by checking your dipstick regularly. Pull it out, wipe it clean, then reinsert it fully before checking the oil level.
If the oil appears low, add the correct type through the oil fill cap, but don’t overfill. Also, inspect the oil filter—if it’s loose or leaking, it could be a leak source.
Keep an eye on engine coolant levels too. A drop could indicate oil mixing with coolant because of a head gasket issue. Low oil or coolant levels that fluctuate without explanation may signal an oil leak from the head gasket.
Regular checks help catch leaks early before they cause major engine damage.
Identifying Leak Sources
After checking your oil levels, the next step is to carefully inspect your engine for signs of leaks. Look for oil spots or puddles under your vehicle, especially near the head gasket area.
Examine valve cover gaskets, the oil pan, and around engine cooling components, as leaks can come from those spots. Check the engine block for discoloration or wet spots, which might mean a leak.
Pay attention to the oil’s consistency—if it looks thin or gritty, it suggests oil loss or contamination. Use a flashlight to inspect those hard-to-see areas and look for fresh oil residue.
Finding the leak early helps prevent further engine damage and keeps your cooling system working properly.
DIY Repairs for Head Gasket Oil Leaks (When It’s Safe to Do It Yourself)
Before you jump into DIY repairs, it’s really important to honestly think about whether you feel comfortable working on your engine. Don’t rush it—you want to make sure you’re confident in your skills so you don’t end up causing more issues.
Also, take a moment to gather all the tools you’ll need beforehand. That way, you won’t have to stop in the middle of the repair looking for something, which can lead to mistakes or frustration.
If you do feel pretty confident and have the right equipment, then you might be okay to handle the repair yourself safely. Just make sure you’re really up for it and know what you’re doing!
Assess Your Skill Level
Evaluating your skill level is an important first step before trying to fix an engine oil leak from the head gasket. You should be comfortable diagnosing issues, understanding engine parts, and using basic tools.
Check the engine oil color; dark, gritty oil can indicate a serious gasket problem. Get familiar with your engine’s gasket material—whether it’s composite, MLS, or rubber—and know how it wears over time.
If you’ve fixed small engine problems before and can follow detailed instructions, you might be ready to try a DIY repair. But if you’re inexperienced or the issue seems complicated, it’s safer to call in a professional.
Knowing your limits helps prevent further damage or risking engine safety. Be honest about your skills before jumping into the repair.
Gather Necessary Tools
To begin your DIY head gasket oil leak repair, gather the right tools to do the job safely and effectively. Start with basic hand tools like screwdrivers, wrenches, and socket sets to remove engine components.
A torque wrench is essential for tightening bolts properly, making sure the head gasket is secured correctly. You’ll also need a scraper or gasket remover to thoroughly clean the mating surfaces.
Use a coolant system pressure tester to check for leaks, and keep a clean cloth handy for oil cleanup. Before you start working, turn off the engine and let it reach the right temperature.
Just be sure not to work on the engine while it’s hot. Plus, check the oil viscosity to ensure you have the correct oil grade for your vehicle.
Signs You Should Hire a Professional for Head Gasket Repair
Knowing when to call in a professional for head gasket repair is super important, especially if you notice persistent or worsening symptoms.
If your engine shows signs like coolant mixing—where coolant and oil appear either before, after, or during engine operation—it’s a clear sign to seek expert help.
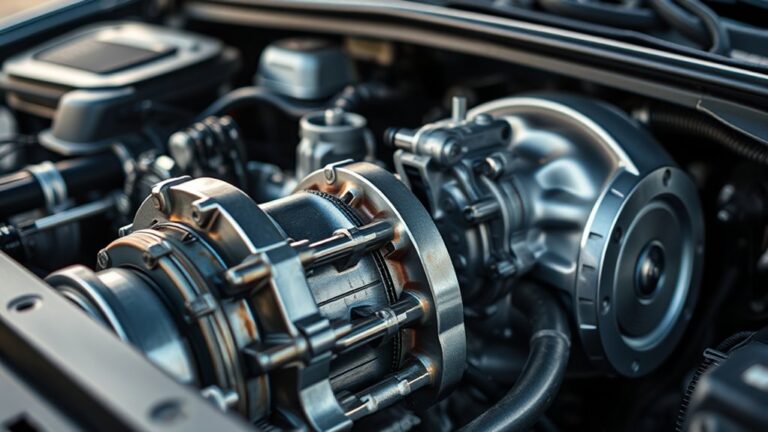
Turbocharger failure can also point to head gasket issues. If your turbo isn’t responding as it should or you notice a sudden spike in oil consumption, it suggests there’s something more serious going on.
Severe overheating or consistently high engine temperatures despite topping up coolant are warning signs that need a professional diagnosis.
Trying to fix it yourself could cause more damage, especially if coolant leaks into the combustion chamber or oil passages.
If you see unusual exhaust smoke, detect a sweet smell from the engine, or experience engine misfiring, don’t wait—get professional help.
Addressing these issues early can save you from costly repairs and help keep your engine running smoothly.
Professional Repair Options for Head Gasket Oil Leaks
When dealing with a head gasket oil leak, professional repair options focus on accurately diagnosing the problem and restoring the engine’s integrity. Technicians usually start with a thorough inspection, checking engine cooling components to see if a damaged head gasket is affecting heat regulation.
They might perform pressure tests and use dye to pinpoint the oil leaks exactly. Replacing the head gasket is often necessary, especially if oil viscosity has caused erosion or damage. Modern repairs could include machining the cylinder head for a better seal or installing a high-quality gasket that can handle heat and pressure.
An expert can also verify that the engine cooling system is working well to prevent future leaks. Overall, choosing professional repair ensures the leak is fixed properly, helping to maintain maximum engine performance and avoiding further damage from circulating oil or overheating.
Tips to Prevent Future Head Gasket Oil Leaks
After fixing head gasket oil leaks with professional repairs, it’s important to take steps to prevent future issues. Proper engine cooling is key; regularly check your coolant levels and follow the recommended flushing schedule. This helps avoid overheating, which can put stress on the gasket.
Keeping the engine at the right temperature reduces the chance of leaks forming. Maintaining good fuel efficiency also plays a role by reducing engine strain. When the engine isn’t working harder than necessary, the risk of leaks goes down.
Here’s a quick guide to help you stay ahead:
| Prevention Tip | Why It Helps |
|---|---|
| Keep coolant topped up | Prevents overheating and gasket stress |
| Regularly change oil | Keeps the engine healthy and seals in good shape |
| Use high-quality fuel | Less engine stress, better combustion |
| Schedule routine checks | Catch small issues early and avoid leaks |
How to Minimize Damage From an Oil Leak
It’s really important to spot oil leaks early on so you can avoid more serious damage to your engine. Just sticking to regular maintenance checks can make a big difference—they help you catch any issues before they become major problems.
Also, using a good quality oil seal is a smart move because it can significantly cut down the chances of leaks happening in the first place. By taking these simple steps, you’re not only protecting your engine but also saving yourself from some pretty steep repair costs down the line.
Prompt Leak Detection
Have you noticed any signs of an oil leak from your engine? Prompt leak detection is essential to minimize damage. Start by checking for dark spots or oil spots on the ground beneath your vehicle.
Look for unexplained drops on your engine or oil residue around the head gasket area. Understanding the engine oil composition helps identify leaks—thicker oils may leak less easily but still pose risks.
Be aware of head gasket materials, which can influence the likelihood and visibility of leaks. Quickly addressing a leak prevents oil loss, engine overheating, and potential damage to internal components.
Regularly inspecting these signs can catch a leak early, saving you costly repairs down the line.
Regular Maintenance Checks
To minimize damage from an oil leak, regular maintenance checks are really important. These checks help you keep an eye on the engine oil chemistry, making sure the oil stays at the right viscosity and isn’t contaminated. This reduces stress on the gasket material and keeps everything running smoothly.
Inspecting your oil level and color regularly can help spot early signs of leaks or oil breakdown. Tighten any loose fittings and replace worn gasket parts before small issues turn into big problems. Staying vigilant saves you from costly repairs down the line.
Using the correct oil type for your engine, based on its specifications, also supports good oil chemistry. Keeping up with routine maintenance extends the gasket’s lifespan and helps your engine run reliably for longer.
Use Quality Oil Seal
Choosing a high-quality oil seal is essential for minimizing damage when an oil leak occurs. A well-made seal can better withstand engine oil composition and resist contamination from road debris. This helps prevent further engine damage and reduces repair costs.
To verify you select the right seal:
- Opt for seals made from durable materials that resist wear and chemical breakdown.
- Choose seals specifically designed for your engine’s make and model for a perfect fit.
- Check reviews for seals proven to withstand road debris without compromising integrity.
- Regularly inspect seals for cracks or signs of leaking, replacing them promptly.
Using quality oil seals reduces the risk of ongoing leaks, protects engine components, and keeps your vehicle running smoothly despite external challenges like debris or harsh conditions.
Tools You’ll Need for DIY Head Gasket Repairs
You’ll need a specific set of tools to effectively tackle a DIY head gasket repair, so make sure you have everything ready before you start.
Start with basic hand tools like a socket set, wrenches, and screwdrivers—these are essential for removing engine components.
A torque wrench is crucial for tightening bolts to the manufacturer’s specifications, so you don’t risk damage.
An engine hoist or stand can help support the engine if needed, which makes the job much easier.
You’ll also want a compression tester and possibly a leak-down tester to diagnose the engine, helping you identify leaks accurately.
Having a clean work surface, gloves, and safety glasses is essential to keep the process safe.
And don’t forget to check the oil viscosity now. Knowing it helps avoid mixing incompatible oils during reassembly.
With the right tools, your repair job will be more manageable, letting you diagnose, dismantle, and reassemble your engine efficiently.
Troubleshooting Persistent or Severe Oil Leaks
Persistent or severe oil leaks can be tricky to troubleshoot, especially after doing basic repairs. If the leak still persists, it’s time to look deeper.
Start by checking if your engine oil viscosity fits your climate and driving conditions. Using the wrong viscosity can make leaks worse. Next, verify that your oil filter is compatible with your engine. An incompatible filter might not seal correctly, causing leaks.
Inspect the oil filter carefully for any damage or signs that it wasn’t installed properly. Then, look around the head gasket area for cracks or damage, as severe leaks often come from these spots.
Finally, think about internal engine issues like piston ring wear. This can cause oil to seep out externally. By going through these steps, you’ll better understand the root cause of your leak.
Deciding to get a professional diagnosis or repair might be necessary if the problem continues. Following this plan helps prevent more damage and ensures a more lasting fix.
Frequently Asked Questions
How Long Does It Typically Take to Fix a Head Gasket Oil Leak?
Fixing a head gasket oil leak typically takes around 8 to 12 hours, depending on how severe the leak is and your mechanic’s experience. You’ll need time for oil leak detection, pinpointing the head gasket symptoms, and completing the repair.
If the leak is minor, it might take less time. But for more extensive damage, the process can extend into a two-day job, especially if additional engine repairs are needed.
Can a Head Gasket Leak Cause Engine Overheating?
A head gasket leak is like a crack in a dam, allowing pressure to escape. When it fails, your cooling system can’t regulate engine temperature properly, leading to overheating.
The leak can cause cylinder pressure to drop, making the engine work harder and generate more heat. Without proper cooling and pressure control, your engine risks overheating, which can damage components or cause failure.
Addressing the leak quickly is important to keep your engine running smoothly and prevent costly repairs.
Is Engine Oil Leakage From the Head Gasket Safe to Drive Through?
Driving with oil leaks from the head gasket isn’t safe. Oil leaks can cause engine damage, fire hazards, or oil loss, which affects lubrication and safety.
Ignoring these leaks makes safety worse, risking engine failure or accidents. It’s best to fix the leak quickly before driving more.
If you see oil spots, smoke, or smell burning odors, avoid driving and get professional repairs. This helps keep you safe and prevents costly damage.
What Are the Long-Term Risks of Ignoring a Head Gasket Oil Leak?
Ignoring a head gasket oil leak is like leaving a slow leak in a dam. It risks a catastrophic failure down the line.
Over time, engine damage becomes unavoidable as oil contaminates vital components, weakens seals, and causes overheating.
This neglect speeds up wear and tear, which can lead to costly repairs or even engine replacement.
Don’t wait too long to fix it. Addressing the leak early helps keep your engine healthy and prevents long-term, irreversible damage.
How Much Does Professional Head Gasket Repair Usually Cost?
Professional head gasket repair typically costs between $1,000 and $2,500, depending on your vehicle and repair shop options.
You’ll usually pay for labor, which can be high because of the gasket’s complex materials and the radiator removal needed.
Prices can vary based on the type of head gasket used and where the shop is located.
It’s a good idea to get a detailed estimate from a trusted repair shop to compare your options.
Conclusion
Dealing with a head gasket oil leak can be tricky, but with a sharp eye and the right tools, you can catch and fix small problems before they turn into a major headache.
Spotting the leak early is key. Look for hints like oil spots on your driveway, milky or frothy oil, or a noticeable drop in oil levels. These signs point to a potential head gasket issue that needs attention.
Once you suspect a leak, check for oil leaks around the head gasket area. A flashlight and a clean cloth can help you spot fresh oil or residue. Sometimes, you’ll see oil seeping from the gasket or between the cylinder head and engine block.
Fixing a head gasket oil leak involves specific steps. You’ll need to drain the engine oil, remove the necessary components, and replace the gasket if you’re experienced. For minor leaks, using a head gasket repair additive might offer a temporary fix—but don’t rely on it for long.
In some cases, problems with the head gasket are serious and require professional attention. If the leak is severe or if you notice overheating or loss of coolant, it’s best to call in a mechanic.
Remember, knowledge of when to seek expert help guarantees you avoid the pitfalls of automan’s folly. Stay vigilant, perform regular inspections, and your engine will run smoother than a well-oiled machine.
Keeping an eye on potential head gasket oil leaks will help ensure your vehicle stays reliable on the road for many miles.